Shoulder Horseshoes

Update: 09/02/20 - Version 2.2 has been checked and the assembly instructions have been completed.


This is a 3d model of the CSR Shoulder - Horseshoe made from the CSR Shoulder - Horseshoe 20140601.pdf drawing and including the Horseshoe Shim.

The image links to a 3d pdf file, click on it if you want to be able to rotate the image around and examine it from other angles. (Note, the 3d.pdf file opens in a new window. If you have problems with the 3d feature you may have to upgrade to the latest version of Adobe Reader).

After 'activating' the 3d mode by clicking on the display
select a part by left clicking on it (the part will be highlighted)
then right clicking brings up a window.  Follow the sequence
-> part options -> part render mode -> transparent
to make the outer parts transparent and the inner
details visible.


This is a part of the CSR Shoulder - Horseshoe 20140601.pdf drawing that shows the dimensions of the detail slots on the horseshoe. The image links to a copy of the full .pdf drawing

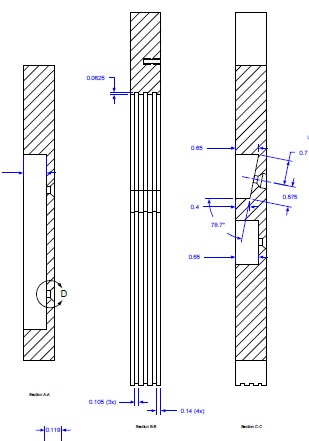
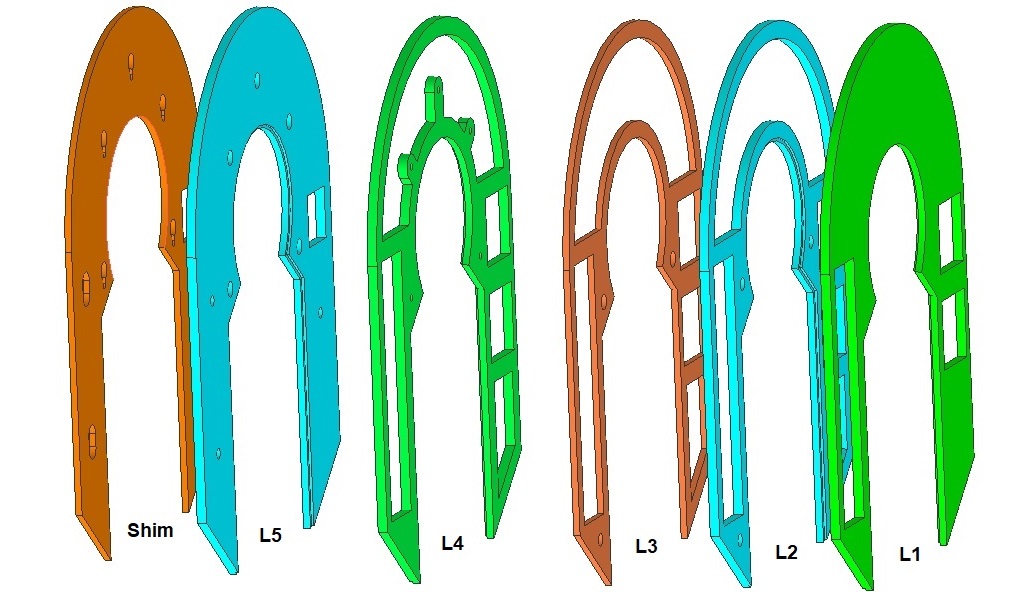
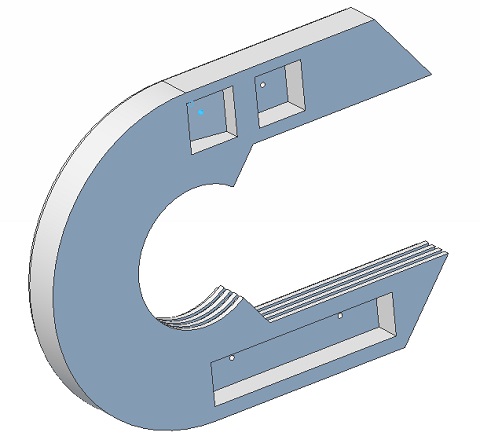
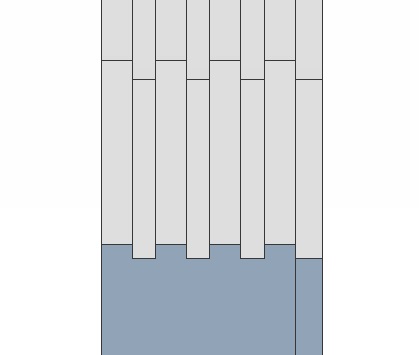
The 'ribs' are .14 wide while the slots are .105 wide. You can see them clearly in the image above.

This is and end view of the model above.

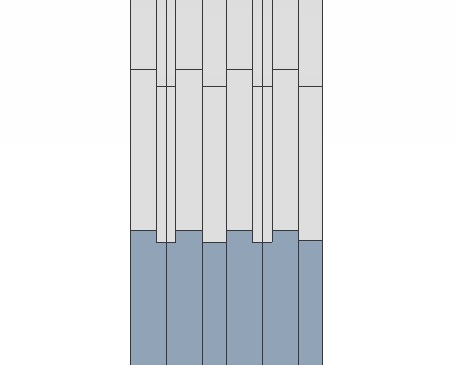
This is how I'm proposing to build the Shoulder Horseshoe.
The 
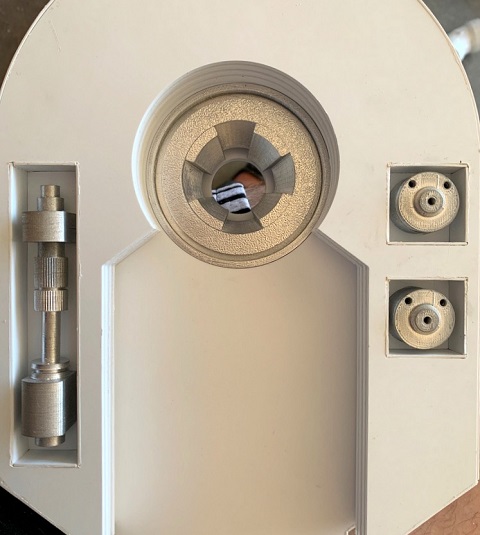
question is, Can you tell the difference?
Here I've overlaid one set of images on the other

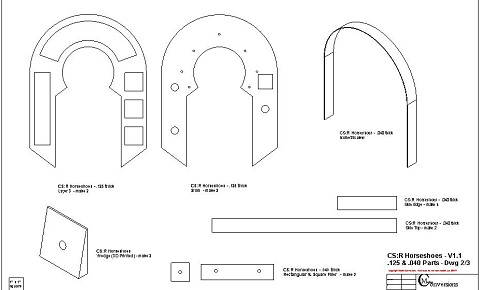
In the model (no layer lines) the spacing is based on the CAD drawing:
.14 - .105 - .14 - .105 - .14 - .105 - .14 - .125 (shim)

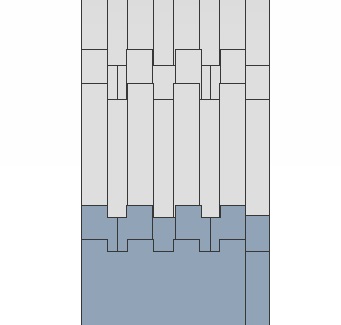
The proposed fabrication, is based on pairs of .1875 layers with .05 notches in the edge, and a single .125 layer in the middle.
the  spacing is:
.1375 - .10 - .1375 - .125 -
.1375 - .10 - .1375 - .125 (shim)

The center notch, where the difference is .02 is about the only place that I can tell the difference in the drawings.

Prevailing opinion was that the .02 difference would be hard to see!

Parts Assembly


Ver 2.2 prototype has been put into production. For assembly instructions go to the assembly pages

To the Left is an exploded view of the assembly. That image links to a larger version where it's easier to see the details. The assembly instructions have more detailed drawings.

There are 4 layers of .188 with a layer of .125 in between the two sets of .188 and a final layer of .125 for the shim. I've taken the liberty of carving out sections of the inner layers to reduce the weight of the finished parts. There are a few .040 parts to bring the cavities to the correct depth as well as a 3D printed wedge.

I've added keyhole slots to the shim for mounting. If you don't want to use a shim you can use it as a template to cut keyhole slots in your legs.
Version Updates -  With V2.1 I began installing 8-32 nutserts to provide a way to screw in the mounting bolts.
V2.2 cleaned up some assembly details and improved the assembly instructions.
You can download a documents package that has detail drawings of each layer as well as the other components HERE.
Thanks to R2 Builder David Codding, here's a picture of my Shoulder Horseshoe with 3D printed Shoulder Hydraulics, Shoulder Buttons and Shoulder Hub installed!

You can find those parts on my 3D printed parts page:
http://www.r2-3d.media-conversions.net/


Home