The Arm Box

My Eggcrate Frame is different enough from Dave Everett's Styrene Droid Design that his Arm Box design won't fit in my frame without modifying it. My ribs are closer together so the width of the design is more tightly constrained. If you are using my frame, the box is mounted on a pair of spacers to bring it to the correct height. It's designed to be removable in case you need to make repairs. You may need to adjust the spacers that position the arms within the box to suit your skins and the way you mounted them on your frame.


This is my version of an Arm Box. I used 1/4 inch OD plastic tube for the shaft and bearings to suit. Larger plastic tube can be used for as spacers to locate the arms within the box. The top and bottom of the boxes are symmetrical.

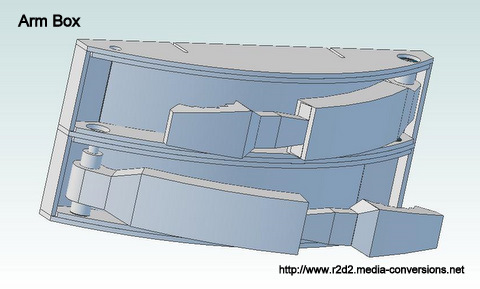
Click on the image for a 3D .pdf version.

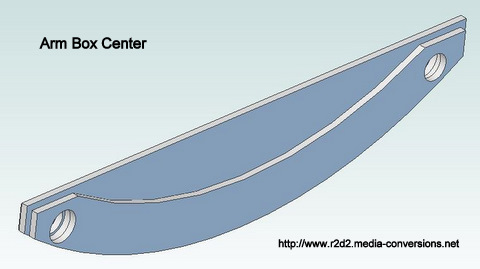
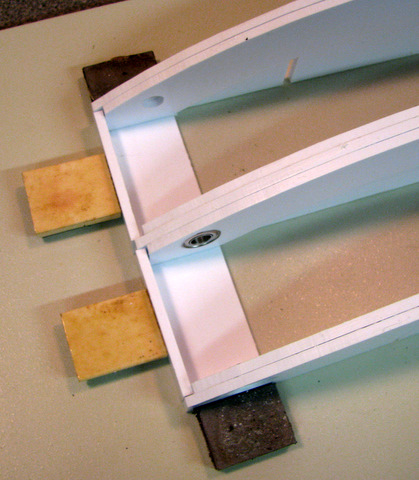
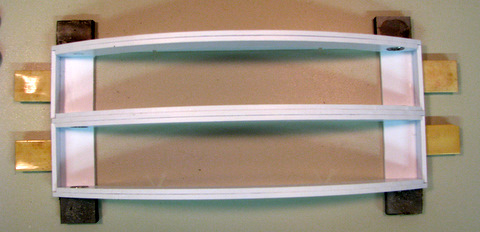
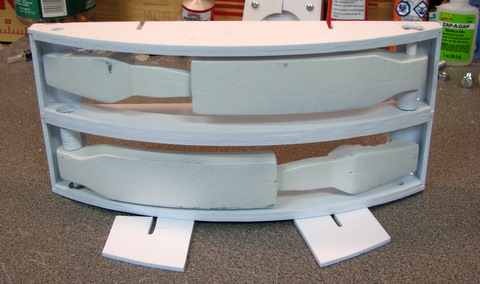
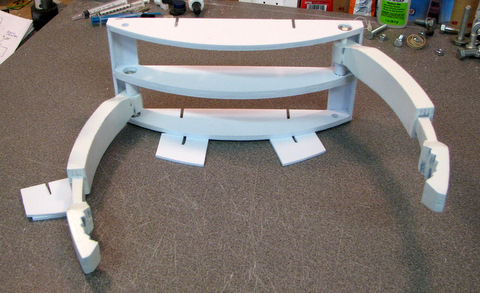
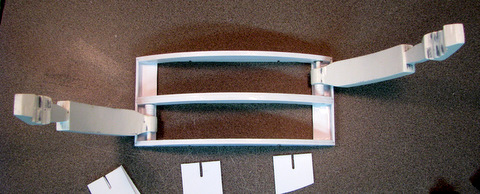
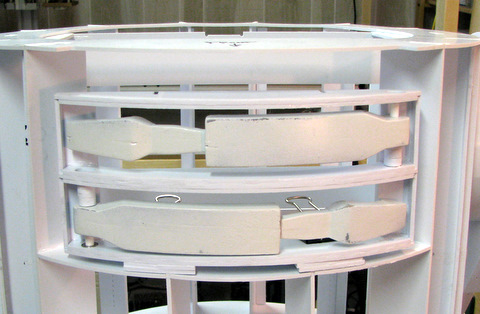
These are the Center and Top/Bot parts to the Arm Box without the bearings. They are linked to 3D .pdf files so you can see how the flanged bearings fit.

This is the layout of the parts panel.

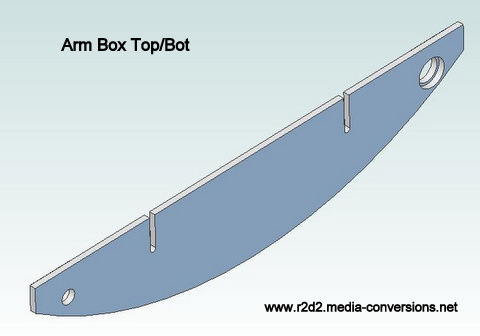
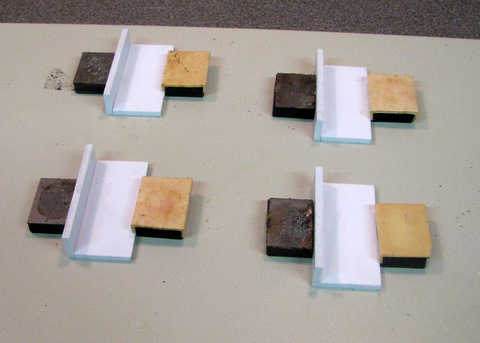
The outside top/bottom sections have the slots. Their mating inner top/bot pieces have matching small holes (for screwdriver access).

The Inside Middle section has no slots and two large holes. The mating inner pieces have one hole larger than the other. When you assemble the stack make sure the smaller holes are on opposite ends.
A note on the mechanical parts. Some of this information is also on the arm box .pdf drawing file
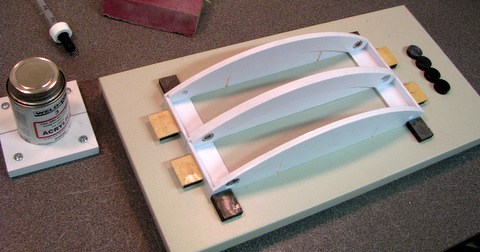
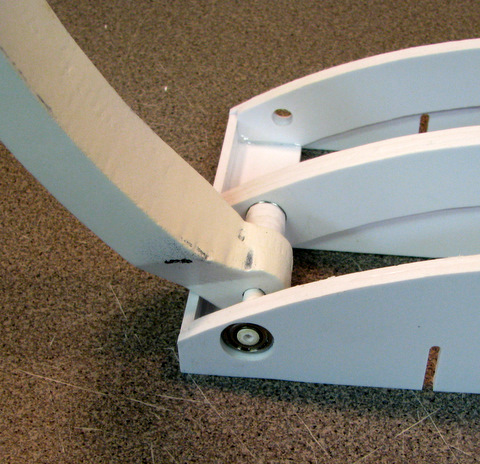
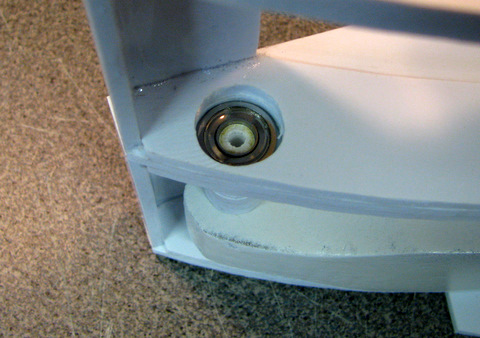
Plastic Tube - used as shaft - .25 OD x .125 ID x 2.25 long - 2 pcs - Plastruct #90106 or equiv
Using a plastic tube instead of a .25 metal shaft allows you to anchor the tube in place by putting a small screw in the end.
Flanged Bearing - .25 ID x .5 OD - type fr188zz (the zz means they are shielded, you don't really need the shield). Strictly speaking you could use a bushing instead of a bearing as this is not a heavy duty application so get any kind of fr188 bearing.
While VXB is the source almost everyone thinks of first but at about $5/bearing they are not a low cost supplier.
Boca Bearing was offering a 10 pack SKU:  #99FR188-ZZ-X10 for $12
Boca was also on Amazon so check there, and as usual, also run a search on Ebay (you might get free shipping from either one!)

Here's how I assembled the parts. Feel free to use whatever technique you prefer.


I tried using a different construction method with this project.

That's a painted steel sheet on my work surface and a set of magnets holding the corner parts in place.

Then I used a dropper to put some Weldon #3 on the joint.

The Top, Bottom, and Center sections were held together with spring clips. The bearings have been inserted in these pictures to maintain the parts alignment.

The corner pieces from the previous step are used to verify the edge positions while clamping.

Again, apply Weldon #3 along the inside edge of the curve in sufficient amount to hold the parts together.

A closeup of the top/bottom section (single bearing)

A closeup of the center section (2 bearings, mirror image)

Above: Once the glue is dry on the sub-assemblies are ready, you are ready to finish your Arm Box.

Right: Make sure all of the joints are aligned and the assembly is square. Then Apply glue.


Right: I found the front edges of the top/center/bottom sections were not glued tightly so I applied more Weldon #3 and clamped again.


Now that the Box is complete, Insert the bearings, and then add your Utility Arms. The one's shown here still need some finishing work


The Bushings shown here were made from layers of plastic glued together. They came out poorly. Get tubing to fit over the .25 shafts the Arms are mounted on.

Once you start playing with the Arm Box you will realize that the Arms pivot without friction. The slightest tilt and your arms swing out!

I used plastic tubing. A small (#4 or #6) screw cutting it's own threads in the tube will be enough to hold it in place at the top of the bearing.

And Finally, Here's the Arm Box mounted in the Frame.


The design drawings are available as both Autocad .dwg files and Adobe .pdf files download drawing files with the understanding that the drawings are copyright to Media-Conversions and are not to be used commercially. (That note also appears on each of the drawings). Part information on the bearings and tubing I used is on the drawing files.


Home